Thursday, June 19, 2014

Project Life // Week 21

For week 21 I used the latest Studio Calico kit: Hello, Hello. This past month I also got their scrapbook add-on Hola, and their special stamp set Aloha. Also supplemented with the latest Freckled Fawn Ohdeerme kit and cards/embellishments from my stash.

Week 21 Spread
This spread was really fun, bright, and colorful. I didn't have as many pictures as I hoped, so I broke down my journaling into a couple of 3x4's and had a filler card. I tried to balance out all the color with more black and white photos, which I ended up liking.

Week 21 // Right side
Week 21 // Left side
My favorite card is probably the 4x6 card with me and Bren making silly faces. It is a really simple card, with very little embellishments, but for some reason I love it so much.

Week 21 // Progress
As you can see from my progress picture, it can get quite cluttered on my desk. I usually try to keep all the embellishments and stamps sets I want to use out, because if I don't see it, I don't use it. And of course I have a bunch of different adhesives for different things. How does your work space look when you're working on your project life?


Wednesday, June 18, 2014

Project Life // Week 22

I was able to do 3 weeks worth of spreads in 4 days, so you'll be able to see more up here soon! I was also running out of ink, so my project life was on hold until I could go pick some ink up from Costco for my printer. For those of you wondering, I print at home on my HP Officejet printer. To see more on my project life process you can see my past post here.

Week 22 Spread

For this spread, I used Studio Calico's Camelot kit and supplemented with my stash of PL cards and embellishments. Also used some some embellishments from Studio Calico's South of Market and Essentials line.

Week 22 // Right side
Week 22 // Left side
The 4x6 journal card had colors I wasn't really into so I changed it up a bit and covered it with washi tape and some word stickers. I find myself having to change up a lot of PL cards because they are either too "girly" or I just don't care for the colors. I'll write a tutorial on that soon. 


Week 22 // Detail

My favorite card (aside from the 4x6 family photo) is actually the week card! I had an idea in mind to layer on the sequins on the bottom and it actually worked out pretty well. By the way, look at Freckled Fawn's label washi tape! I mean, how genius is that. It came in the #ohdeerme kit I won (and it was a huge roll!).


Studio Calico Stamp sets
As you can see from my last post, I've been making a lot of cork embellishments lately. I got so many new, fun stamp sets that I thought it might be a great way to make embellishments (and also a fun thing to give to pen pals).

Have you made any special embellishments lately? What's your favorite kind?

Tuesday, June 17, 2014

Project Life // Week 23

Oh my, is it the middle of June already? I can't believe it, the year is halfway over! For some reason May was so crazy busy and I was exhausted half the time so I became super behind on crafting and pen pals. I'm still waiting for my big break where I can just get paid to craft and travel and eat (or win the lotto. Whichever comes first, I'm not picky ;) )

Anyways, I caught up on all my pen pals first, then started to catch up on my Project Life which I am a little (ok, a LOTTLE) behind. To make it easier for me, I started catching up with the most recent week first, Week 23!

Week 23 Spread

For this kit, I used a combination of things, but mostly had PL cards + embellishments from Studio Calico's Camelot kit, then supplemented with cards from my stash. I also used some embellishments from Freckled Fawn's ohdeerme kit, which I won a free kit from one of their instagram giveaways.

Week 23 // Right side

In order to make it easier for me to catch up, I tried to keep things fairly simple. I changed up my weekly card and decided that from week 21 and forward I'll be using something other than the printable I've been using for the first 20 weeks.

Week 23 // Left side

Week 23 // Details

I also used Studio Calico's Celebrate stamp set for the cork banner, cork stars, and some of the stamped sentiments. I was happy that my mini star punch from Michaels worked perfectly with the star stamps in the set.

Studio Calico: Celebrate stamp set

My favorite card in this spread is the 4x6 card of my husband and Bren with all the ampersands. I was inspired by @paintpaperstudio's instagram post of her ampersand project life sheet, and I think it was a great way to use those ampersands which sometimes I have trouble using.

Thursday, May 15, 2014

DIY Project Life Sleeve

In my last project life spread, I made a little sleeve to hold some memorabilia I had from our mini family trip. There are some things that I don’t want to dedicate a pocket to (for example, I would rather show a photo than a hotel room key), so this little sleeve is a great alternative, and easy to do!


For this DIY, all you need are 2 project life cards, washi tape, and an optional circle punch. These two project life cards are from the Kiwi Core kit, and the washi tape is My Minds Eye, which you can get here!


I like to take the circle punch and punch out a semi-circle on the edge of one project life card, this is just to make it easier for me to take things out of the pocket once its finished.


Then you line up the two cards together, and tape the other 3 edges with washi tape! And that’s it!


Hope this little DIY helps you add some special souvenirs to your project life!


Wednesday, May 14, 2014

Project Life // Week 17

Still trying to catch up, so I kept week 17 pretty simple. This week I used project life cards from the exclusive Kiwi Core kit that was only found at Joann's. Lucky for me, I was able to swap some of my Jade core kit for some of a Kiwi core kit through Instagram - which, btw, is a great way to get a variety of kits without breaking a budget ;). Plus, each core kit comes with so many multiples that you can easily split the kit into 1/3rds to swap while still having a good amount of the kit for yourself.

Week 17 Spread

Week 17 // Right side

Week 17 // Left side

Week 17 // Details
I love these new Mambi stickers I picked up from Michaels this past week. They're clear so you can see the color behind them. My favorite card from this week is the Easter 4x6 card. I fussy cut a camera from a 3x4 card from the Kiwi core kit and used it as an embellishment. I also used a bit of foam adhesives to layer some photos and embellishments this week. And of course sequins, sequins, sequins. I re-stocked my gold sequins from Studio Calico and picked up some blues. We'll see when I get tired of using sequins as embellishments, but it doesn't seem like anytime soon, haha.


DIY sleeve

A new thing I did in this spread was to include some small bits and pieces from our mini-trip, but in a DIY sleeve using project life cards and washi tape. I also made it kind of hidden by layering an instax photo on top of it. A tutorial will be coming up soon, so keep an eye out for that! :)

Monday, May 5, 2014

Project Life // Week 16

For week 16 I used my newly purchased Jade core kit, which I love almost as much as my Midnight core kit.  In attempt to clean out my stash again, I used a variety of embellishments from past kits as well as my usual sequins + chipboard + wood veneers.

Week 16 Spread

Week 16 // Right side

Week 16 // Left side

I think I still have trouble incorporating washi tape, which is a shame because I feel like my washi tape collection grew by x3 since the beginning of this year, LOL. This spread actually came together pretty quickly, kept a good amount of cards pretty simple and even used a filler card for this week from the Jade core kit since I loved it so much.

Week 16 // Details

 My absolute favorite card is the one of my friend's baby Livy, shes just so cute. I used the cork letters to spell out "XO" and gold sequins in a diagonal to lead up to the chipboard heart. "XO", by the way, is a great way to use up the letter X when you have all these left over alphas that you can't make words from.

Sunday, May 4, 2014

Project Life // Week 15

So, I am now 3 weeks behind, lol.

For Week 15's project life cards I mostly used the latest Studio Calico kit which was Blue Grass Farm, then I supplemented with 4x6 cards from my stash. With each kit I try to use it for at least 2 straight spreads and then I add the left over cards to my stash. With this kit, I was also trying to use up some of the embellishments I had leftover from other kits. For example, I had a asterisk sticker sheet with just a couple of stickers left. I also played around with making my own cork embellishments with older studio calico stamps and just cutting them out.

Week 15 Spread

One new favorite embellishment of mine are these gold alphas I got from Michaels. I used them to create the word "Lovelies" on the 4x6 card.

Week 15 // Right side

Week 15 // Left side

I kept week 15 fairly simple and stuck to my usual embellishment style with sequins, wood veneers, and chipboard pieces so I could catch up since I am a bit behind. I think sometimes when I'm trying to catch up, it can be a bit challenging to be creative.

Week 15 // favorites

My favorite part is probably the Bath Time 4x6 card. I did some journaling on washi tape to make it stand out and I used a camera paperclip I got from one of my pen friends, @sarazorel.

Saturday, May 3, 2014

National Scrapbook Day 2014

Happy National Scrapbook Day!

In honor of NSD, I actually put a 12x12 layout together! I don't remember the last time I scrapbooked in this format, so this was a great reason for me to play around with something a little different.

I used a photo I loved from our most recent family trip of me and Brennan walking on the beach at Pismo. As some of you may know, I took a 2 week leave from work to spend time with my family and my baby before he turns the big 1 in the end of May.


I used a mix of papers, gold sequins, and washi tape to create this layout. I kept it simple and finished this LO in under an hour! I used Studio Calico's prompts from NSD from their blog including their NSD Challenge 01 (to use blue, pink, aqua, with a touch of gold), and their NSD Challenge 05 using one of their sketches.

This was a fun challenge! Makes me feel like I might do more 12x12 layouts in the future. ;)

Tuesday, April 22, 2014

DIY // Shaker Cards

Included in a pen pal booklet I did, I made a shaker card. Today, I'll show you my process in how I make them!

Materials needed: project life sheet protectors (I used the sheet protectors from the mini albums), fillers (sequins, confetti, small wood veneer pieces or chip board), scissors/trimmer, and a sewing machine.


First, take the sheet protector and trim them down. Whats nice about this is that you know that if you sew inside the original lines, these shaker cards will fit perfectly in any project life sheet protectors.


Then, you fill the shaker card with whatever you please, but try not to make it too bulky. Here I used a combination of sequins, and wood veneer stars, all from Studio Calico. Making confetti out of left over scraps is also perfect for this. Also threw in a tag with a quote on one side and a stamped image on the other.


Last part is sewing inside the original sheet protector lines on all four sides. (or just on the sides that are open)


And this is a bonus step - if you want to add any glitter, before you sew your last side closed, you can add a little (or a lot ;) lol)


No sewing machine, you say? No problem! This is easily remedied a couple of ways.

One way to have a no-sew pocket is to use washi tape to seal the ends. Another way to have a no-sew pocket is to use paper scraps, fold them over the edges, and either use a glue runner or a mini attacher/stapler to seal the shaker card closed.


And that's it! What's fun about shaker cards is that you can get really creative with the filling, and its a great way to use scraps and confetti made from hole punches! You can also find other ways to create a no-sew shaker card here, on the Studio Calico blog.


*note: I am not a design member or endorsed by Studio Calico, I just really love their products, and I always get ideas from their blog and community, so I'm just giving credit where credit is due, haha. ;)

Monday, April 21, 2014

DIY // Heart Tabs

A couple days ago I posted about the first pen pal booklet I made and it had these cute little heart tabs! Here, I'll show you how I made them, it's so easy!

All the tools you need are: Heart punch, mini glue dots, washi tape, project life card (or any paper for that matter!)


First, I took a project life card (those cards are so useful!) and I taped washi tape I liked to the back of it.


Then, I used my heart punch to get a bunch of hearts from the card. I honestly use this heart punch way more than I expected to when I first bought it. I love using it to add little heart confetti to my letters and for little projects like this!


Then, I took a mini glue dot and put it on the back of the heart like so...


Then I placed it on the edge of my booklet page with the top of the hearts peeking off the page so you can see them!


And TA-DA! That's it! See, I told you it was easy! :)


I love how little simple things like these heart tabs can really add onto a project or a letter. I can think of so many ways to use these! Can't wait till I can get punches in other shapes! If you end up using this tutorial, please tag #ughiloveitblog, I'd love to see it in action!  XxXx - Jez

Tuesday, April 15, 2014

Snail Mail // Pen Pal Booklet

I just wanted to post my first Pen Pal booklet that I made for my IG friend Sarah (@sarazorel) from Sarah vs The World! She made me this cute pen pal booklet first, then I was inspired to make her one back!

So I was thinking, what can I use for my pages that won't weigh down my letter (since you know, more weight = more postage! lol), and I remembered I had a lot of vellum left from a pack I bought a long time ago. I printed some designs on some vellum the previous night so I had this wonky heart vellum page available to use! I used some simple black Thickers to spell out her name on the cover.


I had some gold glitter cardstock in my stash so I cut a heart out of it and used some other skinny white alphas to write out "Hi". I love the cloudy transparency of vellum and how you can still see the wonky hearts printed on the cover.


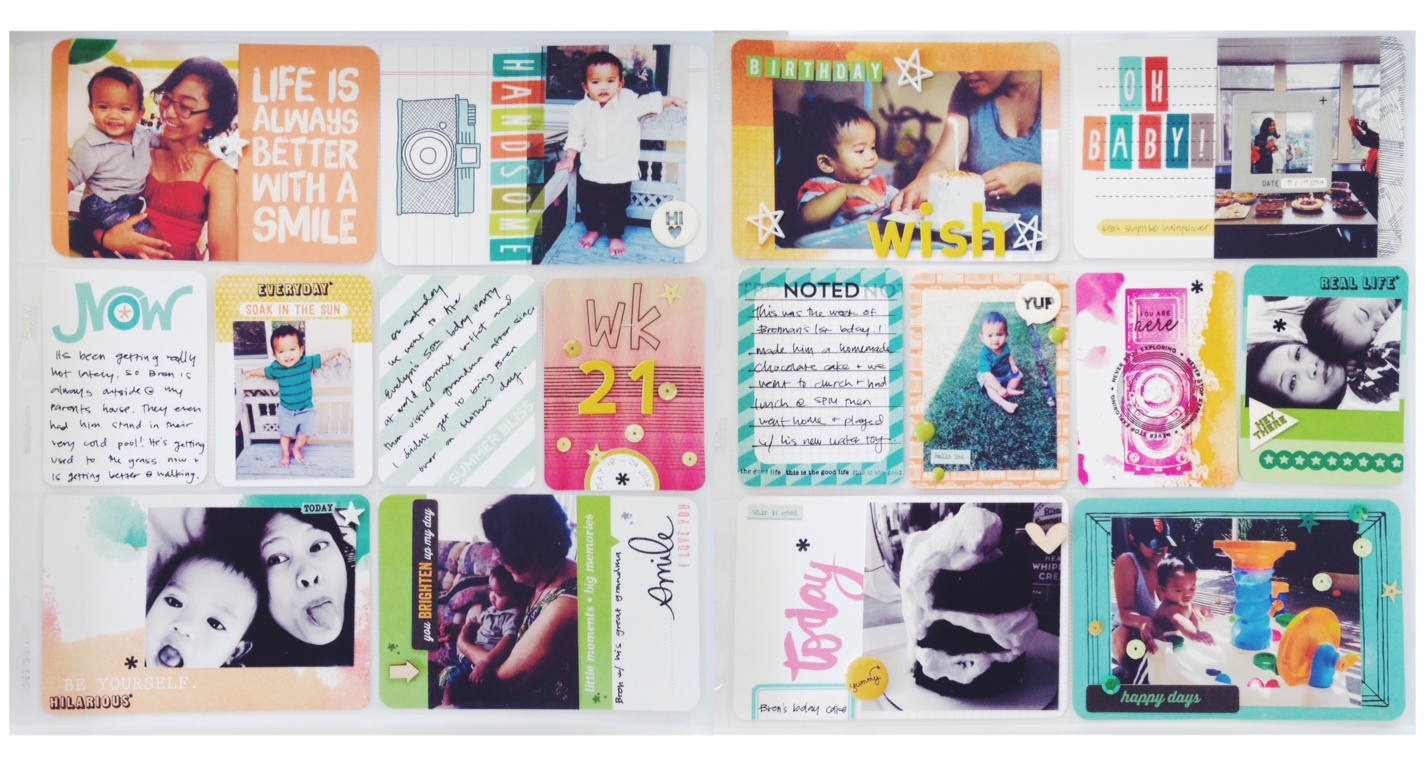
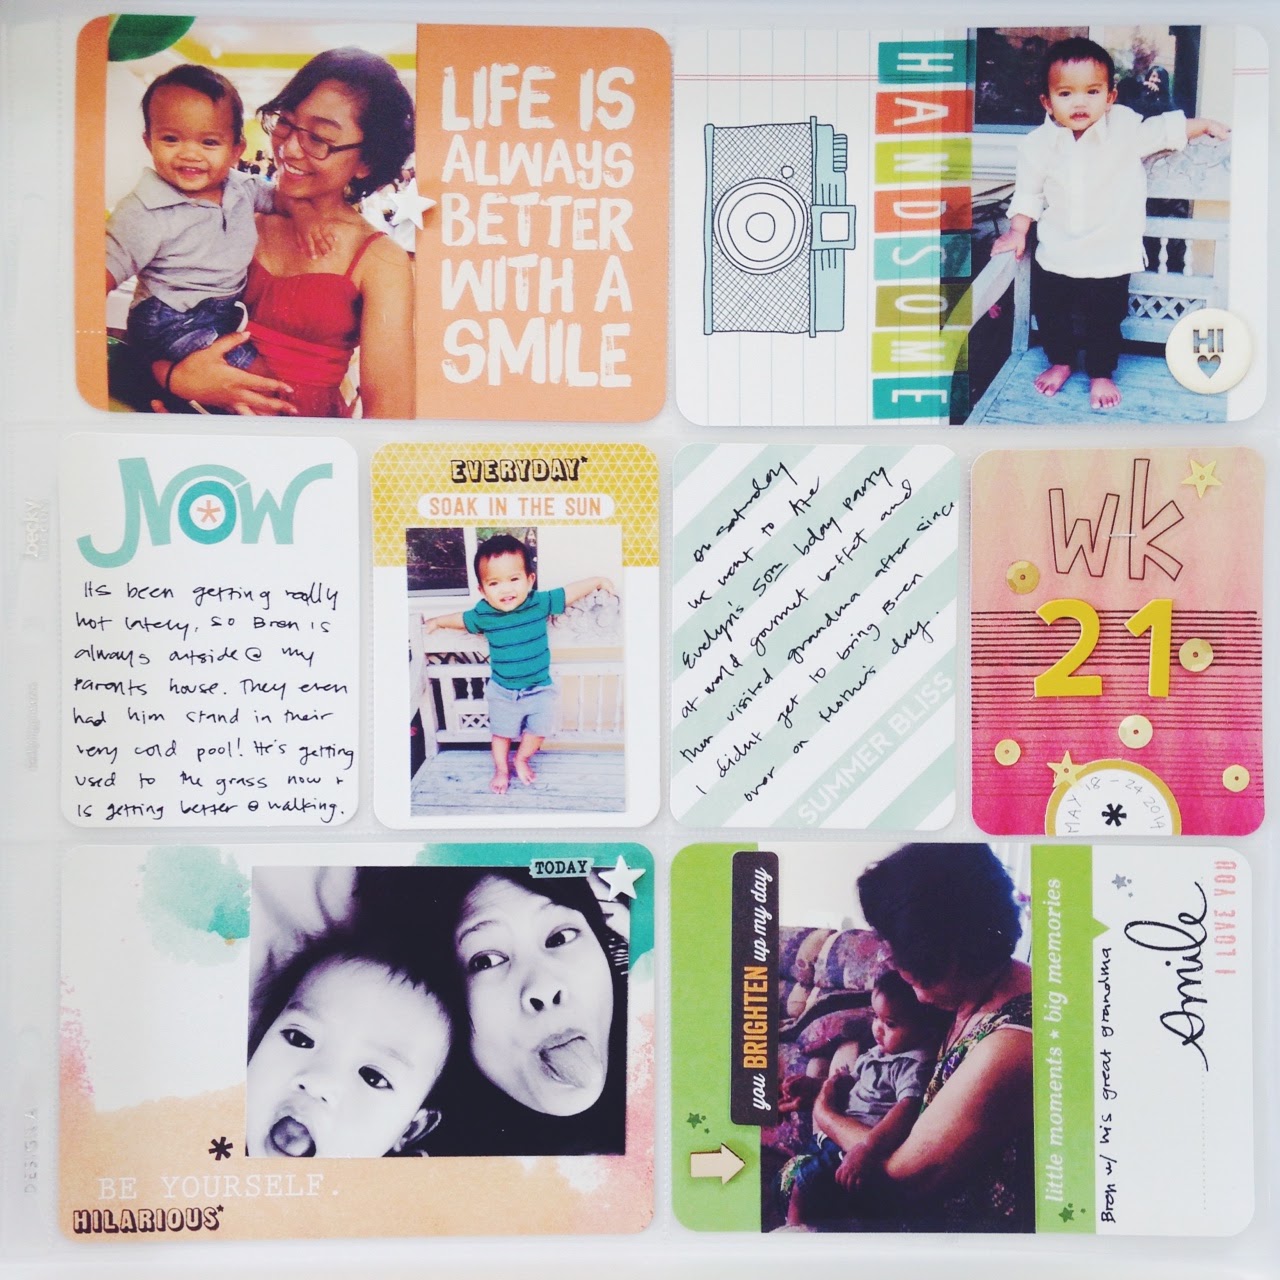
The next spread I used a glue runner and stuck a project life folded journaling card on the left page. I never knew what to do with those cards in my project life, but they seem perfect for snail mail and booklets! I made some vellum envelopes the other night using my silhouette, so I stuck one on the left page to hold my letter.


Here, I used washi tape to stick a watercolored quote card I made awhile ago on the left side. Then on the right side I used a kraft envelope I had and stuck a large tag that fit nicely in it for my mail tag answers. Get it? Mail Tag? hehe..


In the middle of the booklet, I used another project life folded journaling card for the mail tag questions I'll be asking her, as well as my own answers to those questions. Sarah answered her own mail tag questions in her letter to me, and I thought that was a good idea.


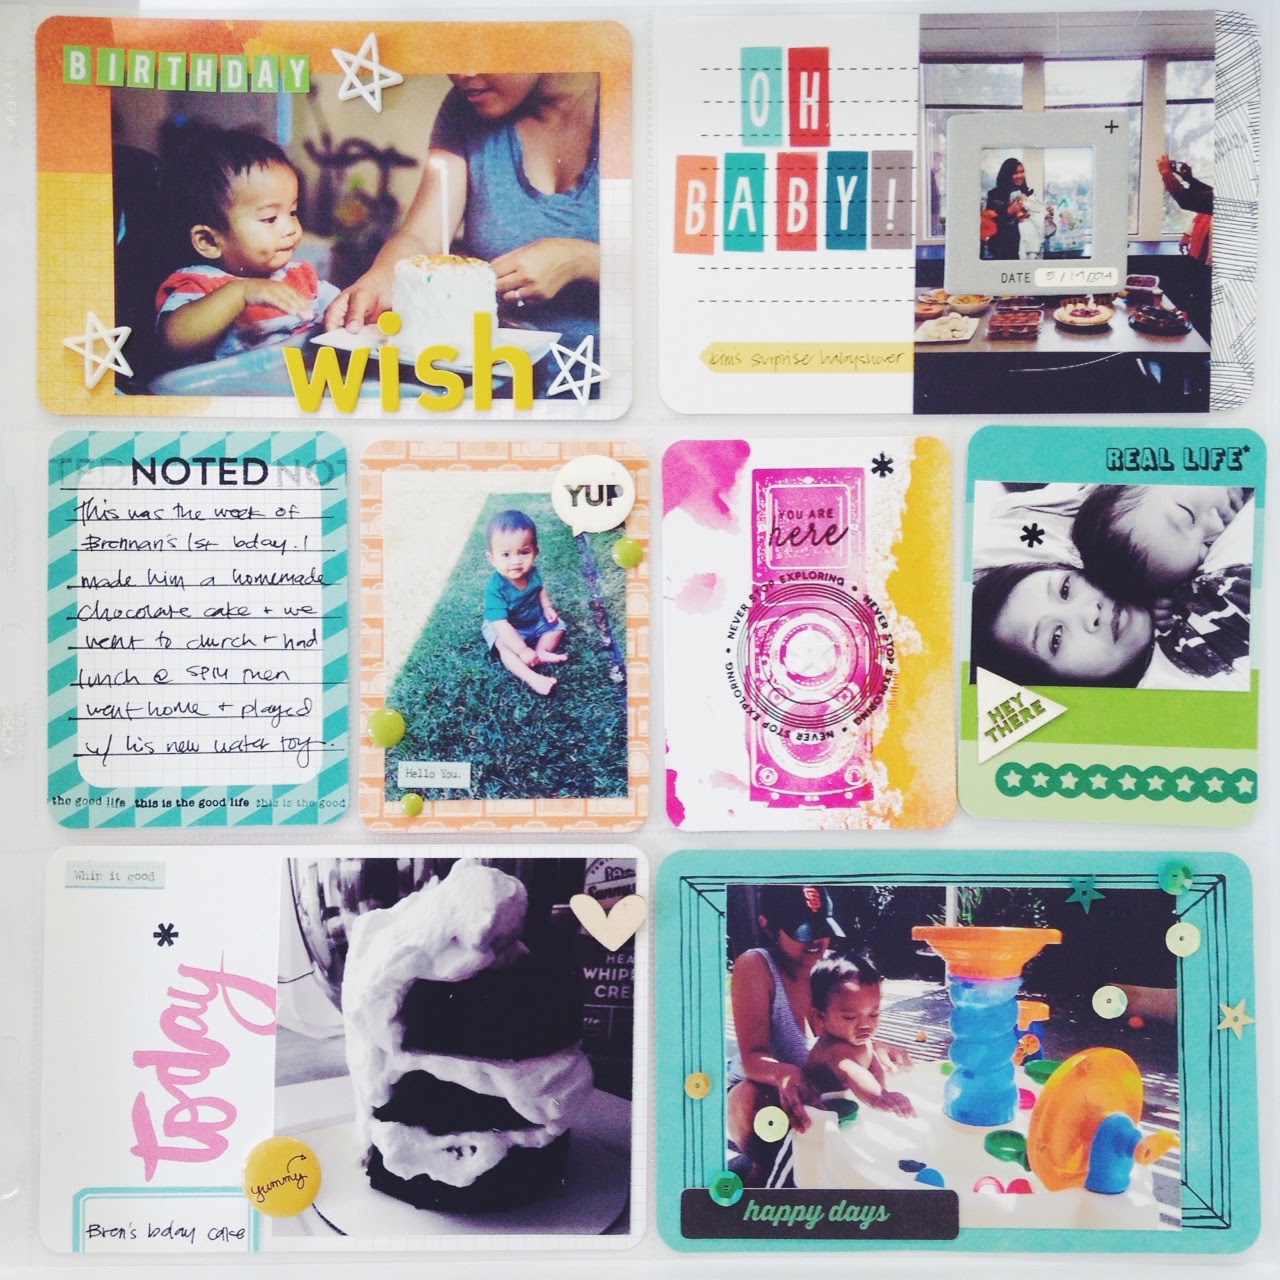
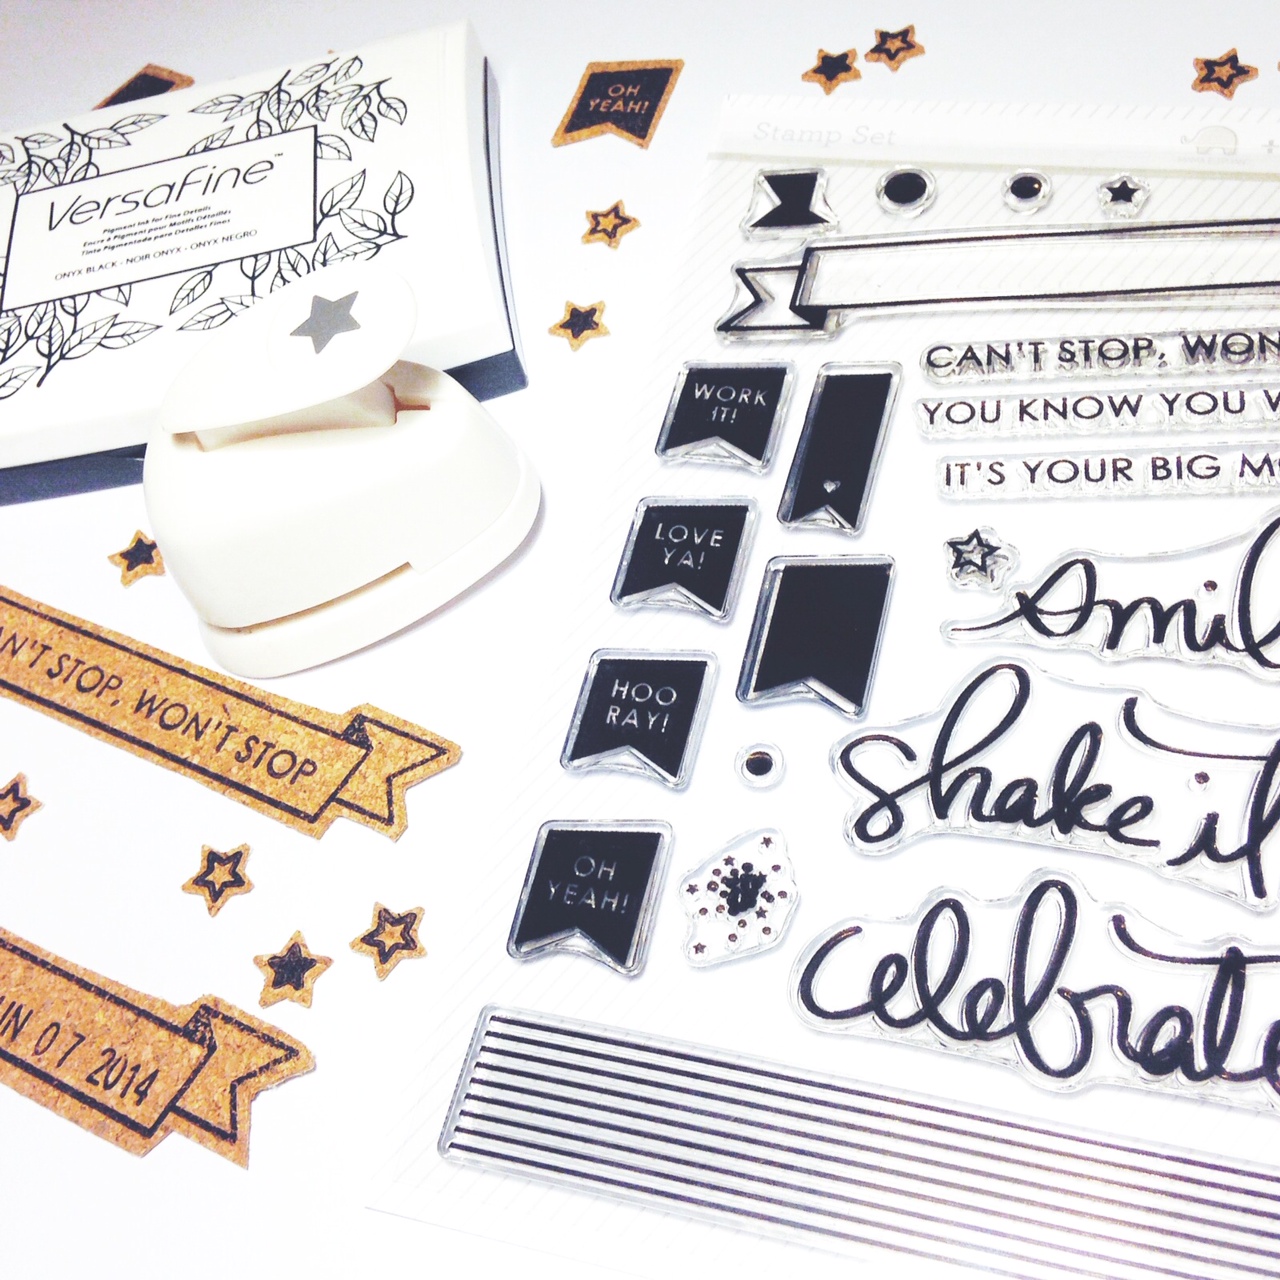
This spread contained a shaker card I made for her project life. I am planning on doing a shaker card tutorial soon, so keep an eye out for that out ;). I also used some skinny washi on one page to write her a note. What's nice about writing on washi tape is that if you mess up, you can just take the washi tape off and start over! I had some ink smears on this page for some reason so I tried to cover it up with some gold sequins, lol.


On the next page I cut up a project life page protector and used a glue runner to stick it to the page, then I used it as a clear pocket to hold the project life cards I'm giving Sarah. The next page is another vellum envelope I made, smaller than the first one, to hold any little goodies I would gift her. I had an unfortunate ink pad accident on this page which resulted me in trying to cover it up with the black and white washi tape, lol.


The last page has a small note for Sarah, using another project life card. I used washi tape to stick it onto the page in case she wants to use the other side for her project life. There was some more ink smears (darn!) but it's ok, lesson learned: if you print on vellum, give it ample time to dry before handling!


In case you were wondering, I used my sewing machine to bind this booklet together since it was too large for my tiny attacher. I had fun putting this together and I will probably experiment more with booklets!


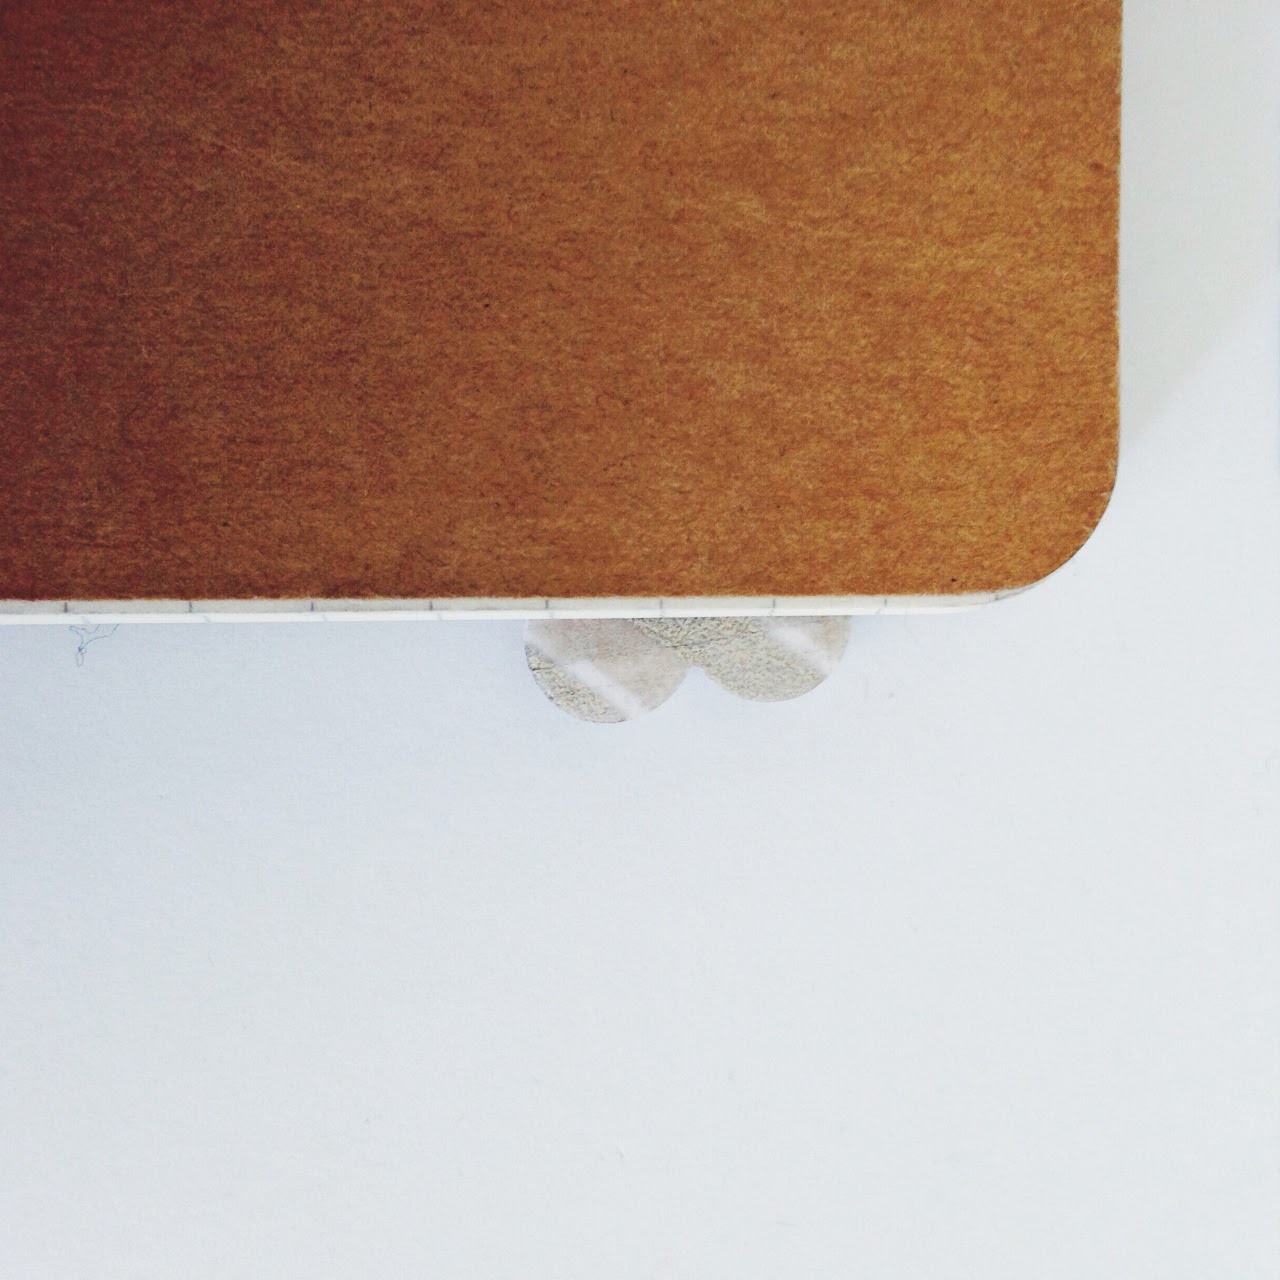
A small little detail I loved from this booklet are the "tabs" I made. I will post a tutorial up about this soon! :)

DIY heart tabs!


If you liked the paper design I used for the cover, I made it available for download here! If you end up using it, please tag #ughiloveitblog so I can see it in action! :)